E-Prime Tutorial #7: Slide States
Overview
In the previous tutorial, you were introduced to the concept of Slide States. That is, one slide can contain many states, or stimuli that can be displayed depending on another condition being met - such as whether the response on a previous slide is correct or incorrect.
Put another way, Slide States are different instances of the same Slide object. For example, you may want to present two types of conditions: one in which the subject responds to the color of a word, and another condition in which the subject responds to the color of a car. Instead of creating two separate Slide objects, you can put both conditions into a single Slide object, making the experiment more compact and more flexible.
Creating the Slide State
You can create Slide States by clicking on the Add Slide State button (which looks like a green plus sign in the Slide object toolbar). Once you create a Slide State, it will look like a default Slide object with a white background. Change the background color to black, and click and drag an Image object to the center of the workspace. Double-click on the Image object, and click on the folder next to the Filename field. Navigate to the My Experiments folder that comes as a default with E-Prime, and then navigate to the Tutorials folder. Select the BlueCar.bmp image. From the Image sub-object’s properties window, set the BackColor to Black, then click on the Frame tab and set the Width and Height to 100% to make the image take up the entire canvas.
Note
If you do not have access to a My Experiments folder that contains the RedCar and BlueCar images, you can download them here.
To activate a particular Slide State, go back to the StroopList object and add another Attribute, labeling it “StateName”. Also add two more levels, with the additional StroopColor attributes being red and blue. Label the last two conditions as redCar and blueCar and the last two CorrectResp attributes as [StroopRedResp] and [StropBlueResp]. Fill in the first four StateName attributes as Stroop, and the last two as Car. This will indicate which Slide State to activate for that trial, as shown in the following figure:
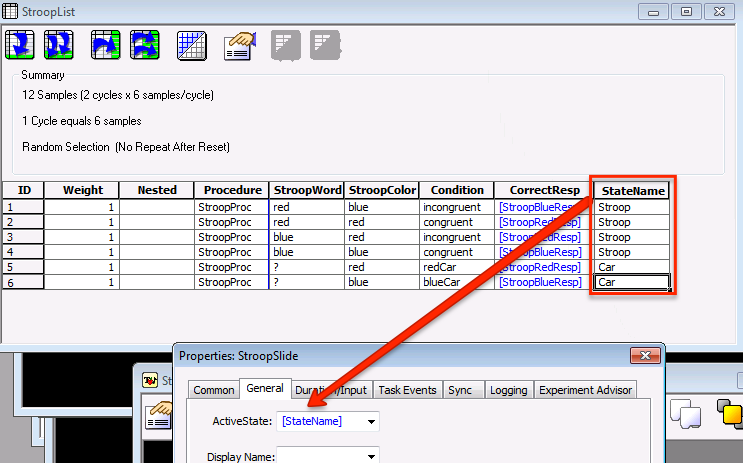
Instead of pointing to just one Slide State, we can have the ActiveState depend on which condition is chosen from a List object. In our example, we created a new attribute called “StateName”, and have the ActiveState field refer to this attribute when presenting a trial. If the StateName attribute is “Car”, then the Car SlideState is activated; if the StateName attribute is “Stroop”, then the Stroop SlideState is activated.
Setting the Active State Field
The Slide State that is presented depends on the ActiveState field, which is found in the property pages of the Slide. The Slide State names can be changed through the sub-object properties pages, and then the ActiveState can point to any one of the Slide States.
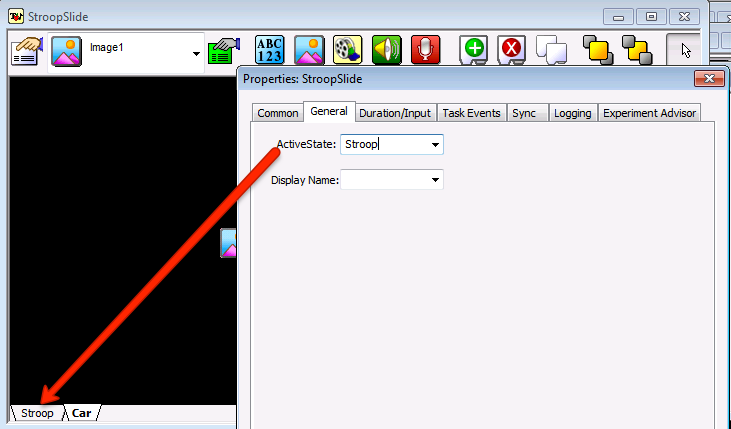
Example of Slide States. In this case, Stroop is the ActiveState. We can change this to an attribute, so that the ActiveState is changed depending on which trial is selected by the List object.
You will first need to rename the Slide States of each sub-object. Click on the tab at the bottom of the StroopSlide object that says Default, and select Default from the dropdown menu at the top of the toolbar. Then click on the sub-object properties button and rename Default to Stroop. Do the same procedure for the Slide State that contains the Car image (in this case, the Slide State by default is named State1). Change this to Car.
From the Car Slide State, click on the Car image and click on the sub-object properties button. Replace the string BlueCar with the string [Condition]; this will display the car image that is indicated in the StroopList object. Lastly, click on the StroopSlide object’s properties button (i.e., the white sheet of paper with a finger pointing to it), click on the General tab, and type [StateName] in the ActiveState field. This will activate either the Stroop or the Car Slide State, depending on which trial is selected from the List object.
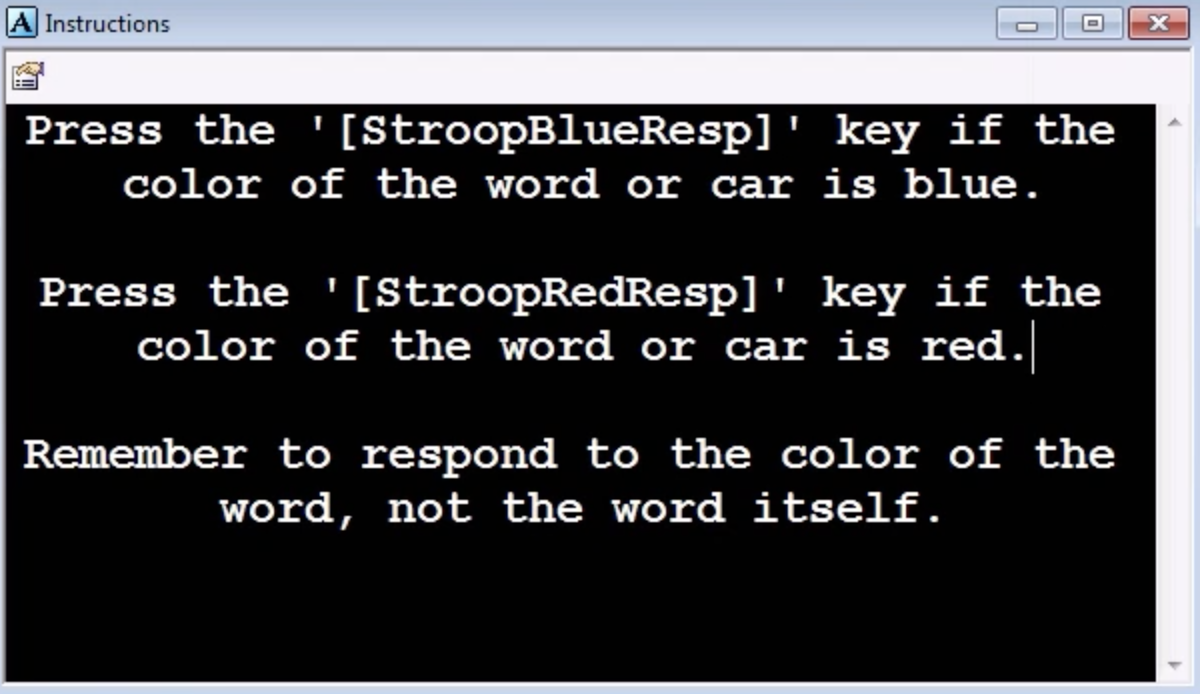
Remember to update the Instructions object so that the subject knows to respond to the color of either the word or the car that is presented:
Next Steps
Once you’ve mastered these basics of objects, properties, and slide states, you will be able to create more sophisticated experiments. The next tutorial will expand the structure of our experiment by including a separate practice session in addition to the experimental trials. To do this, we will use Inline objects, which give you even greater power and flexibility in building your experiments.
Video
For a video review of Slide States, click here.