Chapter 3: Motion Correction
If you’ve ever tried to take a photo of a moving object, usually the image is blurry. If the object is motionless, by contrast, you will get a much clearer and sharply defined image.

A moving target leads to a blurry image (Left), whereas a stationary target leads to a more clearly defined image (Right).
The concept is the same when we take three-dimensional pictures of the brain. If the subject is moving, the images will look blurry; if the subject is still, the images will look more defined. But that’s not all: If the subject moves a lot, we also risk measuring signal from a voxel that moves. We are then in danger of measuring signal from the voxel for part of the experiment and, after the subject moves, from a different region or tissue type.
Lastly, motion can introduce confounds into the imaging data because motion generates signal. If the subject moves every time in response to a stimulus - for example, if he jerks his head every time he feels an electrical shock - then it can become impossible to determine whether the signal we are measuring is in response to the stimulus, or because of the movement.
One way to “undo” these motions is through rigid-body transformations. To illustrate this, pick up a nearby object: a phone or a coffee cup, for example. Place it in front of you and mentally mark where it is. This is the reference point. Then move the object an inch to the left. This is called a translation, which means any movement to the left or right, forward or back, up or down. If you want the object to come back to where it started, you would simply move it an inch to the right.
Similarly, if you rotated the object to the left or right, you could undo that by rotating it an equal amount in the opposite direction. These are called rotations, and like translations, they have three degrees of freedom, or ways that they can move: around the x-axis (also called pitch, or tilting forwards and backwards), around the y-axis (also known as roll, or tilting to the left and right), and around the z-axis (or yaw, as when shaking your head “no”).
Note
Experiment with these translations and rotations by moving your own head. First, move your head from side to side while looking straight ahead (translation along the x-axis). Then, move your head forward and back (y-axis) and up and down (z-axis). Try the rotations as well.
We do the same procedure with our volumes. Instead of the reference point we used in the example above, let’s call the first volume in our time-series the reference volume. If at some point during the scan our subject moves his head an inch to the right, we can detect that movement and undo it by moving that volume an inch to the left. The goal is to detect movements in any of the volumes and realign those volumes to the reference volume.

The reference volume can be any volume of the time-series (although it is typically the first, middle, or last volume). If during the scan the subject moves to the right, that motion can be “undone” with respect to the reference volume by an equal and opposite movement to the left.
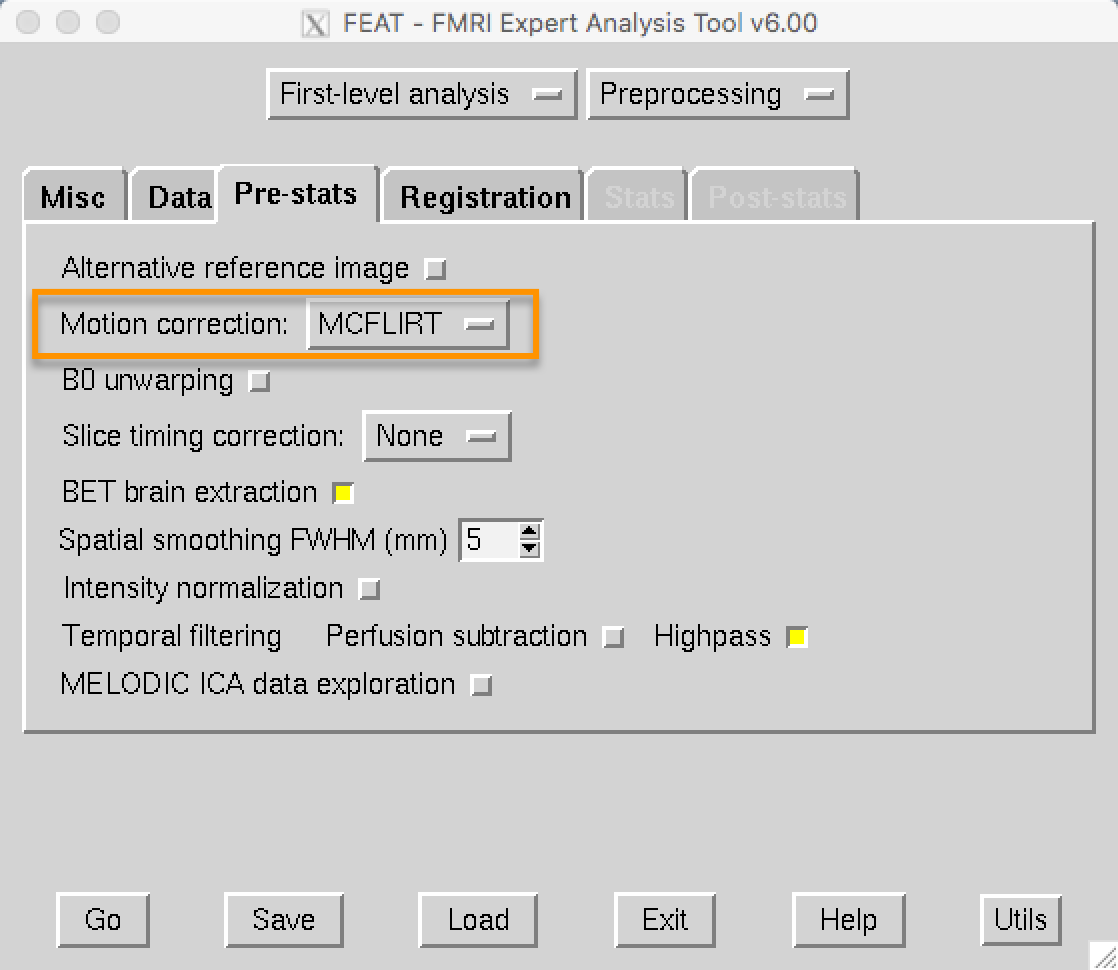
In the FEAT GUI, motion correction is specified in the Pre-stats tab. FEAT’s default is to use FSL’s MCFLIRT tool, which you can see in the dropdown menu. You have the option to turn off motion correction, but unless you have a reason to do that, leave it as it is.
The Pre-stats tab contains other preprocessing options, such as slice-timing correction and smoothing. For an overview of slice-timing correction, click on the Next button.